A Lot That Needs To Be Considered!
There’s literally so much to consider when it comes to maintaining your knives, and the most frustrating thing is all the information can’t be found in one place! What is knife maintenance anyways? In my opinion, knife maintenance encapsulates 5 different processes: sharpening, honing, stropping, storing, and cleaning.
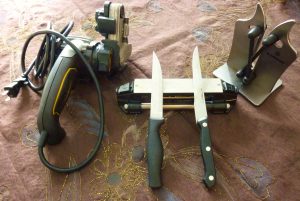
The intent of this article is to provide a detailed breakdown on how to correctly perform each of the 5 processes. If you follow everything outlined in this guide, there’s nothing more you need to do as far as your knives are concerned. Each of these 5 processes can be satisfied/achieved in more than one way. I’m simply sharing what has proved to work for me. Remember, there’s always more than one way to skin a cat!
Process #1: Knife Sharpening (3 Different Ways)
Knife sharpening is about as opinionated as the US elections; everyone has “their” way on how to get it done. Sharpening a knife can be about as simple or complicated as you make it. I prefer to think of it as the former, and not the latter. For the rest of this section, I will go into detail on the 3 conventional ways to sharpen a knife. Why all 3? Simply to give you a broad idea on the different tools available in the market, so you can choose the best one to suit your specific needs. I’ll also provide links to the products I use (NB: these are affiliate links which I would get a small commission for if you choose to buy).
Method #1: Use An Electric Knife Sharpener
Electric knife sharpeners have gained popularity over the last couple years, and that’s because they’re incredibly quick and easy to use. These devices are especially popular with home cooks, and with folks who don’t quite care to learn how to sharpen using stone.
***CLICK HERE TO CHECK IT OUT ON AMAZON***
How To Use
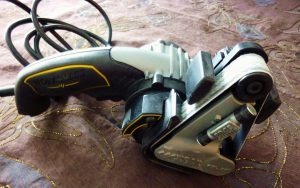
There’s tons of electric sharpeners out there, but my favorite one by far is the Work Sharp Ken Onion Edition, so that’s what I’ll be using here today. If you know how to use the Ken Onion, you’ll have no problem using any other electric sharpener out there. This is definitely one of the more complex devices. Below is a step by step process on how I sharpen a knife using this device!
Step 1:
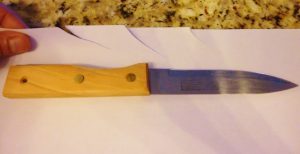
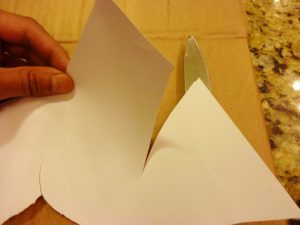
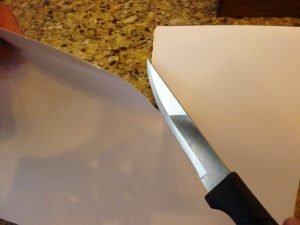
Before I sharpen, I typically have a sheet of paper by my side to test sharpness before and after. Now would be a good time to do a quick paper test. Grab your knife and attempt to slice through. What did you find? Does your edge still have some bite to it, or is it dull as a rock? Knowing this beforehand will be useful in the next step!
Step 2:
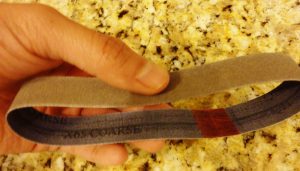
Pick an appropriate grit based on the condition of your knife. In step 1 we tried to get a better understanding of how dull/sharp our knife was. In this step we will now pick a suitable grit to sharpen our knife. Since my knife is pretty dull, I am going with the coarse grit/belt.
Step 3:
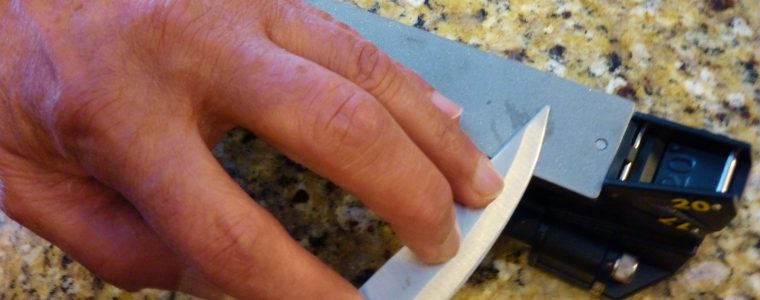
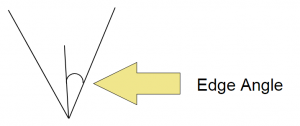
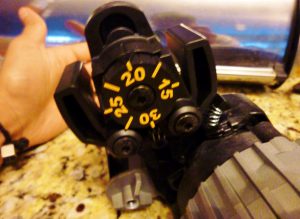
This one’s a little tricky. Step 3 is to select your sharpening angle. Usually I always match my sharpening angle to my edge angle. For those who don’t know, edge angle is simply the measured angle from an imaginary vertical line to the knife’s outer edge (see image below).
Since I’m sharpening a western style kitchen knife, I’ll set my angle to 20 degrees. You’ll need to spend some time to understand what edge angle your knife is. As a very general rule of thumb, Japanese knives are 15 degrees, hunting knives are 25-30 degrees, and most Western/German kitchen knives are 20-22 degrees.
Step 4:
Now it’s time to do the actual sharpening! I’ll start off by doing 8 passes on each side (left/right) with the coarse grit/belt. I’ll start off on the left side.
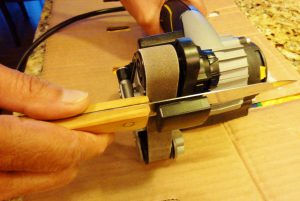
Important: Upon completing all 8 passes on the left side, I’ll proceed by checking for a burr on the right side. What’s a burr? Without making the matter complicated, a burr is the folding of metal on the other side of the edge from that which you are sharpening. How can I tell that a burr has been raised? By slightly feeling the right edge with my finger. Once I have a burr, I’ll do 8 passes on the right side.
Step 5:
Now would be a good time to stop and test for sharpness. I’ll grab my slice of paper and try to slice through. If you’re happy with the results proceed to step 6. If not, repeat step 4 and test for sharpness again.
Step 6:
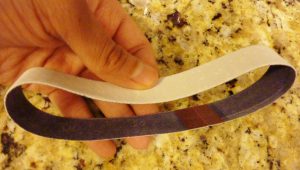
Because I am satisfied with the sharpness of my knife, I will attempt to clean up any imperfections by using a fine/extra fine belt. Doing this will make the edge stronger and sharper. 6 alternating draws on each side should suffice i.e. one draw on the left and one on the right, till I have a total of 6 on each side.
Step 7:
Test for sharpness one final time. I’m happy with the results, so no further sharpening required. Wash the blade thoroughly under lukewarm water, and then towel dry. Voila!
Method #2: Use A Pull Through Sharpener
In my mind, pull through sharpeners are the quickest way to sharpen a knife. It’s for this reason they’re so popular with hikers, campers, hunters, and even fishers. Most pull through sharpeners are also portable, so carrying them with the rest of your gear is quite easy. Let’s see how to use one.
***CLICK HERE TO CHECK IT OUT ON AMAZON***
How To Use
Important: Most pull throughs are single stage i.e. one grit set at some predetermined sharpening angle by the manufacturer. It’s up to you to determine that the sharpening angle matches your edge angle. Do some homework before buying, so you don’t end up with a sharpener that doesn’t match your knife’s edge angle. For example, if you own 15 degree Japanese style blades, you don’t want to sharpen them on a 22 degree pull through.
Step 1:
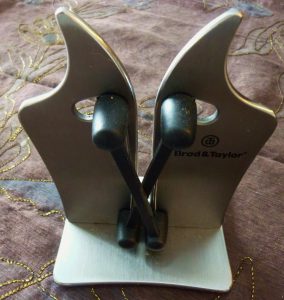
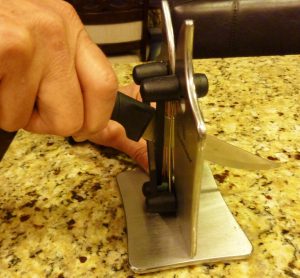
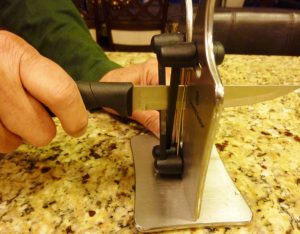
The sharpener I am using for this demonstration is from Brod & Taylor. I’ve found it works pretty well for small kitchen utility knives, so that’s what I’ll be using it to sharpen. For the first 4 passes, I’ll pull through with the tip down, moving from heel to tip.
Step 2:
Next I’ll pull through with the blade and tip horizontal (or parallel to the table). 7 strokes is more than enough.
Step 3:
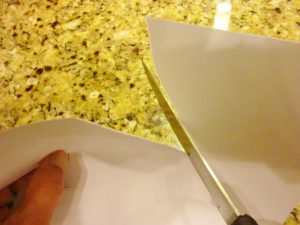
Last but not least, I need to check my results. Let’s do a quick paper test to see how sharp my knife is!
Method #3: Use A Sharpening Stone
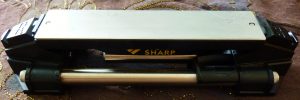
The very last method, and the most oldest of them all…..is sharpening on stone. We’ve been sharpening on stone from pretty much the stone age! In that sense, it’s a tried and true method. Yes it does involve a little bit of a technique, but when you get it right…..there’s nothing quite like it. Don’t believe me? Go ask a Japanese sushi chef! They’ll tell you how they swear to use nothing other than stone to sharpen a knife.
***CLICK HERE TO CHECK IT OUT ON AMAZON***
How To Use
Since I’ve already discussed the “paper test” and “edge angles” in the electric knife sharpener section, I’ll refrain from explaining the details below.
Step 1:
Do a quick paper test to gauge edge sharpness.
Step 2:
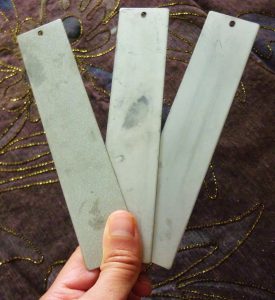
Based on the result from step 1, we will need to decide which stone grit(s) to use. I’ll be using coarse, fine, and extra-fine.
Step 3:
Determine/Understand your edge angle. This is the same angle you will want to sharpen your edge to. I am using a western kitchen knife, so I will sharpen to 20 degrees.
Step 4:
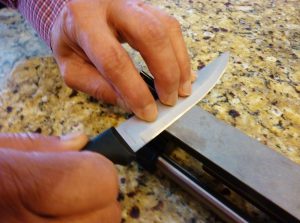
I’m ready to sharpen, but how do I measure 20 degrees? There are many ways to figure this out, but I’ll share with you a simple trick I use. Hold your knife perpendicular to the flat stone. This is 90 degrees. Half of this is 45. Split another half and you have 22.5. Now just tighten it up a notch and you’re at 20!
Step 5:
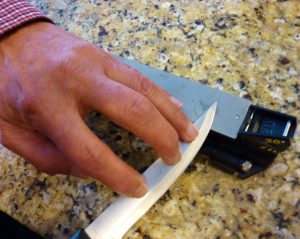
Once my angles are all figured out, the actual sharpening is really not that bad. My technique is to cut against the stone starting from heel and ending at the tip. Simple, slow, and easy. I’ll start off with the left side first. I’ll repeat the motion 8 times.
Step 6:
Provided I’ve raised a burr, I’ll work the right side by doing the exact same thing as I did on the left. 8 passes in total.
Step 7:
I’m through with the coarse sharpening, so I’ll change my stone to a fine/extra-fine grit. I’ll repeat steps 5 and 6, but with one major distinction: I will alternate passes i.e. one pass on the left, followed by one on the right. 6 passes in total for each side.
Step 8:
Finally, a quick paper test to verify my results!
Process #2: Honing
Honing is one of those things people don’t take seriously, and most don’t even know what it is or does. Sharpening is the removal of steel by using an abrasive (ceramic, carbide, diamond etc.). Honing is the realignment of a misaligned edge. What’s the distinction? Generally, there is no removal of metal in honing. So why hone? Why is it so important? Honing a knife will ensure it stays sharp for longer. For example, let’s say I purchase 2 kitchen knives that are identical. I sharpen both at the same time, and then use both for the exact same tasks. I will hone one knife once a week, and leave the other as is. At the end of 3 months, which knife do you think would be the sharpest? The knife that’s honed! Here’s a separate post I wrote on honing. I encourage you to check it out!

How To Hone Using A Honing Rod
Honing rods typically come in steel, ceramic, or diamond. I’ve always been in favor of steel rods over the rest. Honing with steel in my opinion is less aggressive on my knife than honing with diamond/ceramic. This doesn’t mean that people who use ceramic/diamond rods are wrong! My preference is to use a steel rod to hone.
Step 1:
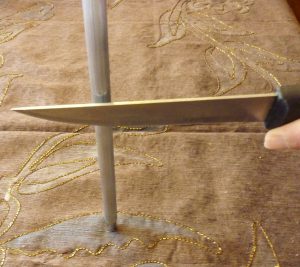
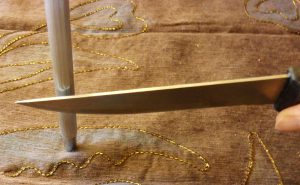
Get your angles figured out. Since this is the third or fourth time we’ve talked about edge angles, I’ll spare you the details. All I will say here is we will hone at the same angle our edge is ground. Mine is 20 degrees so that’s the angle I’ll be maintaining as I hone. To figure out 20 degrees, I’ll hold my knife perpendicular to the rod. This is 90. Split it in half and you have 45. Split 45 yet again and you get 22.5. Tighten it up and we’re at 20.
Step 2:
To hone, simply swipe the blade downward from heel to tip ensuring you maintain the desired angle (20 degrees in this example). I’ll do this once on the left side, and then do the same on the right side.
Step 3:
Repeat step 2 a total of 6 times i.e. complete 6 alternating passes (6 on the left, 6 on the right).
Process #3: Stropping
Some people think of stropping as an extra step included in sharpening, and this isn’t wrong. I choose to explain it separately for 2 mains reasons:
- It’s an important process that warrants detailed discussion.
- In theory, it’s not the same as sharpening (more on this later).
So what exactly is stropping and what added benefit do I get from doing it? Stropping serves to align and polish a knife’s edge. I strop my knives the same time I am done sharpening them. I’ve found doing it this way helps give my knife that little extra bite, so the final result is hair splitting sharpness! Here’s a post I wrote that talks about stropping in greater detail.
How To Strop
Step 1:
I strop my knives at the same angle the edge is ground. Exact same thing as sharpening and honing that we discussed above. I know at this point I probably sound like a broken record, but I want to make sure everything is clear for you guys. How do I figure out my 20 degree angle? Same reference as mentioned previously in the sharpening stone section (check out step 4).
Step 2:
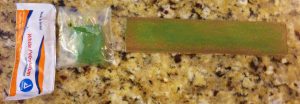
Rub on some stropping compound onto the leather strop. This will help further polish the edge. Don’t overcoat. A little should be fine!
Step 3:
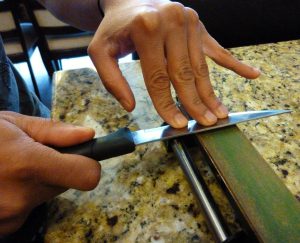
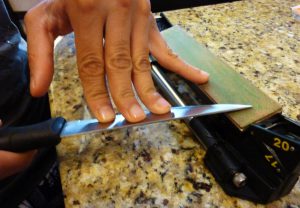
If there’s one important stropping rule I can share with you, it’s this: never cut into the strop. Stropping requires you to “pull away” from the leather, not “push against” it as you would in sharpening. Make sense? Everything else stays the same. Strop from heel to tip ensuring a constant angle is maintained throughout the motion.
Step 4:
I’ll alternate each side and complete a total of 6 passes (for each side). Once I’m done, I’ll give my knife a thorough rinse and towel dry.
Process #4: Storing
The last 3 processes we’ve covered (sharpening, honing, and stropping) all require some technique and practice to be done correctly. The fourth process, storing, requires no technique at all. Everyone can and should be storing their knives properly, there’s no exception not to. Here are 4 common ways to store knives:
Blocks
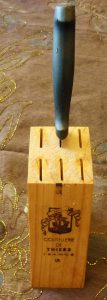
One of my favorite ways to store knives is in a block. It’s quick and easy to store and retrieve, and a good way to keep knives free from moisture and debris.
Drawers
If done correctly, this is also a great way to store knives. Always wrap your knife in a towel and place it in the drawer. This way it doesn’t bang against the rest of your cutlery. If you have a cluttered drawer full of cutlery and your knife is exposed, you risk damaging the edge.
Magnetic Holders
I’m not too familiar with magnetic holders, but from what I’ve heard, they are another great storage tool that take up very little kitchen space.
Sheaths
If kept clean, knife sheaths are a great storage accessory. They’re also stylish and fashionable. If you don’t care for your sheaths, moisture can build up inside and they will eventually ruin your knives! Blocks, drawers, holders, or sheaths are all great ways to store your knives. Pick whichever works for you, and make it a habit to always store your knives once you’re done using them!
Process #5: Cleaning
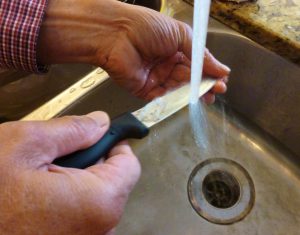
Out of all the 5 processes we’ve talked about today, cleaning is the one most people do incorrectly. If there’s one thing…..just one thing you get out of this post, let it be this: never ever should you put your knife in a dishwasher. Avoid it all costs. Dishwashers are great for many things, but cleaning knives are not one of them. Always wash your knives by hand using a sponge or towel, warm water, and soap. Once complete, towel dry thoroughly (there should be no water) and store immediately.
Do These 5, And Your Knives Will Last Forever!
Follow the 5 processes outlined above, and your knives will serve you well. It’s really that simple. Pick a sharpener, steel, and strop that works for you, and practice doing things right over doing things quickly. Once you get the hang of it, it’ll become muscle memory….trust me! I hope you enjoyed reading, and got some value out of this. Please share on social media if you did. Finally, I’m excited to hear from you guys! Positive or negative….I’d love to hear from you anyways. Let’s get a discussion going below!
